The #1 Bicycle Mechanic Website in the World!

OFFICIAL SPONSORS

Cardio Trek Personal Trainer
Cardio Trek
Sports Trainer
East York, Toronto, ON
Email: cardiotrek@gmail.com
Hours: Tues-Thurs 10-5:30, Sat-Sun 10-3:30
Cardio Trek is best known for teaching archery lessons in Toronto.

Friday, December 1, 2023

14 Tips when Buying an E-Bike

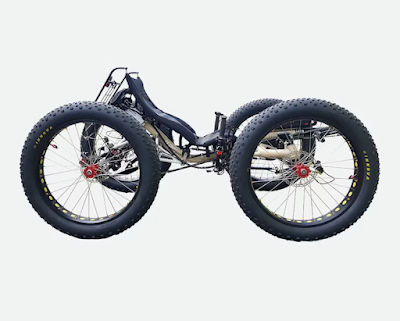
Thinking about buying an e-bike? Or possibly an electric recumbent?

Here are some tips to consider when buying an e-bike:

  1. Determine your riding needs: Assess how and where you plan to ride your e-bike. Consider factors such as commuting, recreational use, off-road trails, or hilly terrains. This will help you choose the right type and features that match your riding preferences.

  2. Set a budget: Determine your budget range for purchasing an e-bike. Keep in mind that e-bikes can vary significantly in price, depending on factors like brand, motor power, battery capacity, and additional features.

  3. Research e-bike types: There are various e-bike styles available, including city/commuter bikes, mountain bikes, folding bikes, cargo bikes, and more. Research different types to find one that suits your intended use and riding style.

  4. Consider motor type and power: E-bikes typically have either hub motors (located in the wheel) or mid-drive motors (located at the crankset). Each has its advantages. Consider the motor power, measured in watts, as it influences the bike's speed and ability to handle inclines.

  5. Battery range and capacity: Pay attention to the battery's range, which indicates the distance the e-bike can travel on a single charge. Consider the battery capacity (measured in watt-hours) as it affects the bike's range and performance.

  6. Test ride multiple models: Visit local bike shops and test ride different e-bike models to get a feel for their handling, comfort, and overall ride quality. This allows you to compare different options and choose one that feels comfortable and suits your riding style.

  7. Consider bike weight and frame design: E-bikes tend to be heavier than regular bikes due to the added components. Consider the weight and frame design to ensure it aligns with your preferences, especially if you need to lift or transport the bike regularly.

  8. Check for quality components: Assess the overall build quality and components of the e-bike, including the frame, brakes, gears, and suspension (if applicable). High-quality components often provide better performance, durability, and safety.

  9. Research customer reviews and ratings: Look for customer reviews and ratings of the e-bike models you're interested in. This can provide insights into real-world experiences and help you make an informed decision.

  10. Consider after-sales support and warranty: Research the manufacturer's reputation for customer support and warranty policies. A reputable brand with good after-sales support can be beneficial if you encounter any issues or need assistance.

  11. Check local regulations: Familiarize yourself with local e-bike regulations and laws regarding maximum speed, power limits, helmet requirements, and where e-bikes are allowed to ride. Compliance with regulations ensures a legal and safe riding experience.

  12. Evaluate maintenance and servicing: Understand the maintenance requirements of the e-bike, including battery charging, software updates (if applicable), and servicing needs. Consider if there are local bike shops or authorized service centers available for repairs and maintenance.

  13. Consider additional accessories: Factor in any additional accessories you may need, such as lights, fenders, racks, or locks. Some e-bikes may come with these accessories included, while others may require separate purchases.

  14. Read the fine print: Before finalizing a purchase, carefully read the warranty terms, return policy, and any fine print related to the e-bike. Ensure you have a clear understanding of what is covered and any potential limitations.

By considering these tips, you can make an informed decision when purchasing an e-bike that aligns with your needs, preferences, and budget.
Wednesday, November 1, 2023

North American Manufacturers of E-bikes

Looking to buy local??? Here is a list of companies in North America that manufacture e-bikes:

  1. Rad Power Bikes (Seattle, Washington)
  2. Specialized (Morgan Hill, California)
  3. Trek Bicycles (Waterloo, Wisconsin)
  4. Giant Bicycles (Newbury Park, California)
  5. Cannondale (Wilton, Connecticut)
  6. Electra Bicycle Company (Vista, California)
  7. Juiced Bikes (Chula Vista, California)
  8. Aventon Bikes (Ontario, California)
  9. Bulls Bikes USA (Southern California)
  10. QuietKat (Eagle, Colorado)
  11. Riese & Müller (North America headquarters in Brooklyn, New York)
  12. BULLS Bikes USA (North American headquarters in Thousand Oaks, California)
  13. Magnum Bikes (Phoenix, Arizona)
  14. Surface 604 (Vancouver, British Columbia, Canada)
  15. IZIP (Simi Valley, California)
  16. Blix Electric Bikes (Santa Cruz, California)
  17. REI Co-op Cycles (Kent, Washington)
  18. Sondors Electric Bikes (Malibu, California)
  19. Yamaha Bicycles (Kennesaw, Georgia)
  20. Elby (Toronto, Ontario, Canada)

These companies specialize in manufacturing a range of e-bikes, including various styles such as commuter e-bikes, mountain e-bikes, folding e-bikes, and more. It's always a good idea to research and compare different brands and models to find the e-bike that suits your preferences and needs.

Plus what if you're looking for an Electric Recumbent?

Here is a list of companies in North America that manufacture electric recumbent bicycles:

  1. HP Velotechnik (North American headquarters in El Segundo, California)
  2. Catrike (Winter Garden, Florida)
  3. TerraTrike (Grand Rapids, Michigan)
  4. ICE Trikes (Bellingham, Washington)
  5. Performer Recumbents (Los Angeles, California)
  6. Cruzbike (Durham, North Carolina)
  7. Bacchetta Bicycles (St. Petersburg, Florida)
  8. Lightning Cycle Dynamics (Lompoc, California)
  9. Volae Recumbents (North Wilkesboro, North Carolina)
  10. Hase Bikes USA (Berkeley, California)
  11. Easy Racers (Watsonville, California)
  12. AZUB (North American distribution in Bend, Oregon)
  13. Trident Trikes (Lincoln, Nebraska)
  14. Rans Designs (Hays, Kansas)
  15. Greenspeed (North American distributor in McPherson, Kansas)

These companies specialize in manufacturing electric recumbent bicycles, which provide a comfortable and aerodynamic riding experience. It's important to explore different brands and models, considering factors such as the specific design, features, performance, and pricing, to find the electric recumbent bicycle that suits your preferences and needs.

See also...

  1. Day 6 Bicycles (Toronto, Ontario): Day 6 Bicycles offers a range of electric recumbent bicycles designed for comfort and performance. Their models include the Samson and the Journey.

  2. Cruzbike Canada (Quebec): Cruzbike Canada specializes in recumbent bicycles, including electric-assist models. They offer various recumbent designs, such as the Vendetta, Silvio, and S40.

  3. Tri-Rider (Quebec): Tri-Rider is a Canadian company that produces electric tricycles, including recumbent tricycles. They offer models like the Tri-Rider R3 and R4 with electric-assist options.

  4. The Electric Vehicle Outlet (Toronto, Ontario): The Electric Vehicle Outlet carries a selection of electric recumbent trikes, including models from various brands like HP Velotechnik and ICE Trikes.


Sunday, October 15, 2023

Insurance Companies that sell Bicycle Insurance

Please note that insurance offerings can vary by region and country. Here is a list of well-known insurance companies that may offer bicycle insurance coverage, along with some brief details about each:

  1. Velosurance: Velosurance is a specialized insurance provider focused solely on bicycle insurance. They offer comprehensive coverage options, including theft, damage, liability, and roadside assistance.

  2. Markel Insurance: Markel Insurance offers bicycle insurance coverage for theft, damage, and liability. They provide customizable policies tailored to individual needs and offer options for accessories and racing bikes.

  3. Spoke Insurance: Spoke Insurance specializes in bicycle insurance and offers coverage for theft, accidental damage, vandalism, and liability. They provide flexible plans with options for different bike types and accessories.

  4. Nationwide (USA): Nationwide offers bicycle coverage as part of their homeowners or renters insurance policies. Their coverage typically includes theft and damage, and it can be customized to fit specific needs.

  5. Progressive (USA): Progressive offers bicycle coverage as an add-on to their homeowners, condo, or renters insurance policies. They provide protection against theft, damage, and liability, with options to add accessories coverage.

  6. Allstate (USA): Allstate offers bicycle coverage as part of their homeowners or renters insurance policies. They provide protection for theft, damage, and liability, and additional coverage options for accessories and high-value bikes.

  7. State Farm (USA): State Farm offers bicycle coverage as an endorsement to their homeowners or renters insurance policies. Their coverage typically includes theft, damage, and liability, with options for accessories and customized coverage limits.

  8. Farmers Insurance (USA): Farmers Insurance provides coverage for bicycles through their homeowners, renters, or condo insurance policies. They offer protection against theft, damage, and liability, with options to add coverage for accessories.

  9. Esurance (USA): Esurance offers bicycle coverage as part of their homeowners or renters insurance policies. They provide protection for theft, damage, and liability, with customizable coverage limits.

  10. Lemonade (USA): Lemonade is a digital insurance company that offers renters insurance, including coverage for bicycles. They provide theft and damage coverage, with straightforward and transparent policies.

  11. Aviva (UK): Aviva offers bicycle insurance coverage in the UK. They provide protection against theft, accidental damage, and liability. Aviva allows customization of coverage based on individual needs.

  12. ETA Cycle Insurance (UK): ETA Cycle Insurance is a specialist bicycle insurance provider in the UK. They offer comprehensive coverage for theft, accidental damage, personal accident, and third-party liability.

  13. Cycleguard (UK): Cycleguard is a UK-based insurance provider offering coverage for bicycles against theft, accidental damage, and personal accident. They provide options for various types of bicycles and accessories.

  14. Bikmo (UK): Bikmo offers bicycle insurance coverage in the UK. They provide comprehensive protection for theft, damage, liability, and personal accident. Bikmo also offers coverage for racing and professional use bikes.

  15. Pedalsure (UK): Pedalsure is a specialized bicycle insurance provider in the UK. They offer coverage for theft, accidental damage, personal accident, and liability. Pedalsure also provides coverage for racing and triathlon events.

  16. Eversure (UK): Eversure offers bicycle insurance coverage in the UK. They provide protection against theft, accidental damage, personal accident, and liability. Eversure offers flexible policies with optional cover for accessories and competition use.

  17. Yellow Jersey (UK): Yellow Jersey is a UK-based bicycle insurance specialist. They offer comprehensive coverage for theft, damage, liability, personal accident, and racing events. Yellow Jersey also provides options for custom bikes and accessories.

  18. Swann Insurance (Australia): Swann Insurance offers bicycle insurance coverage in Australia. They provide protection against theft, accidental damage, and liability. Swann Insurance offers customizable coverage options.

  19. Velosure (Australia): Velosure is an Australian bicycle insurance provider. They offer comprehensive coverage for theft, damage, liability, personal accident, and racing events. Velosure also provides options for accessories and customized policies.

  20. BikeSure (Australia): BikeSure offers bicycle insurance coverage in Australia. They provide protection against theft, accidental damage, and liability. BikeSure offers customizable policies for various types of bicycles.

Remember to review the coverage details, terms, and conditions of each insurance provider to ensure their policies meet your specific requirements.

Sunday, October 1, 2023

14 Tips and Tricks for Preventing Bicycle Theft

Here are some tips and tricks to help prevent your bicycle from being stolen:
  1. Invest in a high-quality lock: Purchase a sturdy, durable lock designed specifically for bicycles. U-locks and heavy-duty chain locks are considered more secure than cable locks. Don't get a cheap lock from Canadian Tire (like the one on the right).

  2. Lock both the frame and wheels: When securing your bike, pass the lock through the frame, front wheel, and rear wheel. This prevents thieves from easily removing parts of your bicycle.

  3. Lock your bike in a well-lit area: Choose well-populated, well-lit locations with high foot traffic to park and lock your bicycle. Thieves are less likely to target bikes in busy areas.

  4. Use designated bike racks: Look for designated bike racks or secure structures designed for locking bicycles. Avoid random poles or fences that can be easily cut or removed.

  5. Avoid leaving your bike overnight: If possible, bring your bicycle indoors at night or store it in a secure, locked area. Overnight thefts are more common, so minimizing the time your bike spends unattended reduces the risk.

  6. Consider multiple locks: Using more than one lock can deter thieves. Use a combination of different lock types (e.g., U-lock and a chain lock) to make it more challenging for them to break through all the locks.

  7. Lock your bike to an immovable object: Secure your bicycle to a sturdy structure that cannot be easily dismantled or moved. Make sure the object you're locking your bike to is firmly anchored.

  8. Remove accessories and valuables: Take off any detachable accessories, such as lights or a bike computer, and store them separately. Additionally, don't leave any valuables or bags on your bike that could attract thieves.

  9. Register your bike: Register your bicycle with your local police department or a bicycle registration service. This can aid in recovery and identification if your bike is stolen.

  10. Use GPS tracking devices: Consider using a GPS tracking device specifically designed for bicycles. These devices can help locate your stolen bike and increase the chances of recovery.

  11. Take a photo and record details: Take a clear photograph of your bicycle, noting any unique features or markings. Keep a record of the serial number, make, and model. This information can be valuable if you need to report a theft.

  12. Be cautious with quick-release mechanisms: If your bike has quick-release mechanisms for wheels or seat posts, consider replacing them with theft-resistant alternatives. Thieves can quickly remove these parts if they are not secured.

  13. Be aware of your surroundings: Stay vigilant and observant when parking or locking your bike. If you notice any suspicious activity or individuals around, it's best to find an alternative location.

  14. Consider bicycle insurance: Explore bicycle insurance options that provide coverage in case of theft. This can offer financial protection and peace of mind.

Remember, while these tips can significantly reduce the chances of your bike being stolen, determined thieves may still find ways to bypass security measures. So, it's important to stay vigilant and take precautions to protect your bicycle at all times.

Wednesday, September 20, 2023

How to True a Bicycle Wheel WITHOUT using a Wheel Truing Stand

Truing a bicycle wheel without using a dedicated wheel truing stand may seem challenging, but it is possible with a few simple tools and techniques. While a truing stand provides more accuracy and precision, the following method can be helpful for minor adjustments or emergency situations. Eg. Like when you need to fix it after a crash and the wheel has tacoed (see photo on the right), but you still need to bicycle home.

Below is a detailed guide on how to true a bicycle wheel without a truing stand:

Tools needed:

  • Bicycle frame (with the wheel mounted)
  • Zip ties or rubber bands
  • Brake pads (optional)
  • Spoke wrench
  • Wheel truing gauge (optional)

Step 1: Prepare the bicycle frame

  1. Securely mount the bicycle wheel you want to true onto the bicycle frame.
  2. Make sure the wheel is properly aligned in the dropouts and securely fastened with the quick-release skewer or axle nuts.

Step 2: Identify the problematic areas

  1. Spin the wheel slowly and observe any lateral (side-to-side) or radial (up-and-down) deviations.
  2. Look for areas where the rim comes closer to the brake pads or exhibits significant deviations.

Step 3: Lateral truing (side-to-side adjustment)

  1. Identify the areas where the rim deviates laterally. These will be indicated by the gap between the rim and the brake pads (if the bike has rim brakes) or by observing the rim alignment with the frame.
  2. Use zip ties or rubber bands to attach the brake pads to the seatstays or fork legs, ensuring they are positioned near the rim. This creates makeshift reference points for lateral truing.

Step 4: Radial truing (up-and-down adjustment)

  1. Identify any areas where the rim deviates radially, either inward or outward. This can be observed by eye or by gently pressing the brake pads against the rim (if using rim brakes).
  2. Locate the appropriate spokes that correspond to the areas where adjustment is needed.

Step 5: Making adjustments

  1. To correct a lateral deviation, tighten the spoke(s) on the side of the rim where it needs to move towards. For example, if the rim is deviating to the right, tighten the spoke(s) on the left side of the wheel. If it is deviating to the left, tighten the spoke(s) on the right side.
  2. To correct a radial deviation, tighten the spoke(s) on the side of the rim where it needs to move away from the frame or brake pads. For example, if the rim is deviating outward, tighten the spoke(s) on that side.
  3. Use a spoke wrench to make small adjustments, turning the spoke nipples clockwise to tighten or counterclockwise to loosen.
  4. Make incremental adjustments of 1/8 or 1/4 turn at a time to avoid over-tightening or causing further deviations.
  5. After each adjustment, spin the wheel and observe the changes. Continue making adjustments until the deviations are minimized.

Step 6: Final inspection and testing

  1. Spin the wheel and observe the trueness and alignment.
  2. Check for any rubbing against the brake pads or frame.
  3. Make further adjustments if necessary, repeating the previous steps.
  4. Use a wheel truing gauge (if available) to check the trueness and ensure the wheel is within an acceptable range.

Note: Truing a wheel without a stand may not yield the same level of precision as using a dedicated truing stand. It is recommended to seek professional assistance or use a truing stand for more accurate and reliable results.

Remember, truing a wheel is a delicate process, and it may take time and practice to achieve optimal results. If you're uncertain or uncomfortable performing these adjustments without a truing stand, it's best to seek assistance from a professional bicycle mechanic for a more precise wheel truing.

Sunday, September 10, 2023

Truing Stand Manufacturers for Bicycles

Here is a list of companies that manufacture truing stands for bicycles:

  1. Park Tool: Park Tool is a well-known brand that offers a range of truing stands, including the TS-2.2 and TS-4.2 models. Their truing stands are widely used and trusted by both professionals and DIY enthusiasts.

  2. Feedback Sports: Feedback Sports produces high-quality truing stands like the Pro Truing Stand. Their stands are known for their durability and precise adjustments, making them popular among cyclists and bike shops.

  3. Minoura: Minoura manufactures truing stands such as the FT-1 Pro Wheel Truing Stand. Their stands are designed to provide stability and accurate measurements, ensuring efficient wheel truing.

  4. Pedro's: Pedro's offers the Portable Truing Stand, which is a lightweight and compact option for on-the-go wheel truing. It provides basic truing functionality and is suitable for occasional use or traveling mechanics.

  5. Unior: Unior produces a range of truing stands, including the 1688 Truing Stand and 1689 Truing Stand Pro. Their stands are known for their sturdy construction and precise truing capabilities.

  6. VAR: VAR is a manufacturer that offers the 318 Professional Truing Stand, which is designed to accommodate various wheel sizes and provide accurate truing adjustments. Their stands are popular among professional mechanics.

  7. Cyclus Tools: Cyclus Tools manufactures truing stands like the Truing Stand 720002. Their stands are known for their solid construction and ease of use, offering reliable truing capabilities.

  8. DT Swiss: DT Swiss produces the DT Truing Stand, which is designed for high-precision truing of wheels. It features a user-friendly design and precise measuring options for professional wheel truing.

  9. Tacx: Tacx offers the Tacx Truing Stand T3175, which provides a stable platform for wheel truing. It is suitable for both home mechanics and professional use.

  10. Abbey Bike Tools: Abbey Bike Tools produces high-end truing stands like the Crombie Tool. Their stands are crafted with attention to detail and offer precise truing capabilities.

These companies provide a variety of truing stands to suit different budgets and needs. When choosing a truing stand, consider factors such as stability, adjustability, and accuracy to ensure optimal wheel truing results.

Friday, September 1, 2023

How to True a Bicycle Wheel using a Truing Stand and Gauges

Below is a detailed guide on how to true a bicycle wheel using a truing stand and gauges:

Tools needed:

  • Truing stand: A device that securely holds the wheel and allows for precise adjustments.
  • Spoke wrench: Used to tighten or loosen the spokes.
  • Spoke tension gauge: Helps measure the tension of the spokes.
  • Wheel truing gauge: Used to determine lateral and radial deviations in the wheel.

Step 1: Prepare the truing stand and wheel

  1. Place the truing stand on a stable surface and ensure it is properly adjusted and leveled.
  2. Insert the wheel into the truing stand, securing it using the quick-release or axle adapters.
  3. Adjust the calipers of the truing stand so that they lightly touch the sides of the rim without exerting pressure.

Step 2: Assess the wheel's trueness

  1. Spin the wheel gently and observe any lateral (side-to-side) or radial (up-and-down) deviations.
  2. Use the wheel truing gauge to determine the extent of the deviations.
  3. Identify any areas where the rim rubs against the calipers or exhibits significant deviations.

Step 3: Lateral truing (side-to-side adjustment)

  1. Identify the areas where the rim deviates laterally. These will be indicated by the wheel truing gauge.
  2. Locate the appropriate spokes that correspond to the areas where adjustment is needed.
  3. To correct a deviation to the right, tighten the spoke(s) on the left side of the hub by turning the spoke wrench clockwise. To correct a deviation to the left, tighten the spoke(s) on the right side of the hub.
  4. Make small adjustments by turning the spoke wrench in 1/4 or 1/2 turn increments.
  5. After each adjustment, spin the wheel to check the trueness and repeat the process if necessary.
  6. Aim for a balanced adjustment, tightening and loosening opposing spokes to maintain overall tension.

Step 4: Radial truing (up-and-down adjustment)

  1. Identify any areas where the rim deviates radially, either inward or outward.
  2. Locate the appropriate spokes that correspond to the areas where adjustment is needed.
  3. To correct an inward deviation, tighten the spoke(s) on the same side as the deviation by turning the spoke wrench clockwise. To correct an outward deviation, tighten the spoke(s) on the opposite side.
  4. Make small adjustments by turning the spoke wrench in 1/4 or 1/2 turn increments.
  5. After each adjustment, spin the wheel to check the trueness and repeat the process if necessary.
  6. Aim for an even adjustment, balancing the tension across the wheel.

Step 5: Tension balancing

  1. Use a spoke tension gauge to measure the tension of the spokes around the wheel.
  2. Adjust spoke tension as needed, aiming for equal tension on both sides of the wheel and maintaining a balanced wheel.
  3. Make small adjustments to individual spokes using the spoke wrench.
  4. Check the tension regularly as you make adjustments to ensure a balanced and properly tensioned wheel.

Step 6: Final inspection and testing

  1. Spin the wheel and observe the trueness and alignment.
  2. Check for any rubbing against the calipers or other parts.
  3. If necessary, make further adjustments following the previous steps.
  4. Once the wheel is properly trued, check the spoke tension again to ensure it remains balanced.

Remember, truing a wheel can be a delicate process that requires patience and attention to detail. If you're uncertain or uncomfortable performing these adjustments, it's recommended to seek assistance from a professional bicycle mechanic to ensure the wheel is properly trued for safe and optimal performance.

Sunday, August 20, 2023

Troubleshooting Bicycle Disk Brakes

Here is a list of common issues that can occur with disc brakes on a bicycle, along with troubleshooting steps and fixes:

  1. Squeaking or squealing noise:

    • Symptoms: High-pitched noise when applying the brakes.
    • Troubleshooting:
      • Clean the brake rotor and brake pads to remove any dirt or debris that may be causing the noise.
      • Inspect the brake pads for wear. If they are worn unevenly or have become contaminated, they may need to be replaced.
    • Fix:
      • Clean the brake rotor with isopropyl alcohol or a specialized disc brake cleaner.
      • Remove the brake pads and lightly sand them with fine-grit sandpaper to remove any glazing or contamination.
      • Reinstall the brake pads and ensure they are properly aligned with the rotor.
      • Bed in the brake pads by gradually applying the brakes and progressively increasing the force until the noise diminishes.
  2. Brake lever feels spongy:

    • Symptoms: Excessive lever travel, poor braking response, lack of firmness.
    • Troubleshooting:
      • Check for air in the brake system or insufficient brake fluid.
    • Fix:
      • Start by bleeding the brake system to remove any air bubbles and ensure proper fluid circulation.
      • Follow the manufacturer's instructions or seek professional help if you are unfamiliar with the bleeding process.
      • If bleeding doesn't resolve the issue, inspect the brake hoses for leaks or damage. Replace any damaged hoses.
      • Check for proper alignment of the brake caliper and rotor, ensuring there is no interference or rubbing.
      • Adjust the brake lever reach if needed, ensuring a comfortable position for your hand.
  3. Brake pads worn out:

    • Symptoms: Reduced braking performance, longer stopping distances, visible wear on the brake pads.
    • Troubleshooting:
      • Inspect the brake pads for wear. If the pad material is worn down to the wear indicators or below, they need to be replaced.
    • Fix:
      • Remove the old brake pads.
      • Install new brake pads that are compatible with your disc brake system.
      • Ensure the brake pads are properly aligned with the rotor.
      • Follow the manufacturer's instructions for proper bedding-in of the new brake pads.
      • Test the braking performance and make further adjustments if necessary.
  4. Brake rotor contamination:

    • Symptoms: Poor braking performance, inconsistent braking, vibration or pulsation when applying the brakes.
    • Troubleshooting:
      • Check for oil, grease, or other contaminants on the brake rotor.
    • Fix:
      • Clean the brake rotor thoroughly with isopropyl alcohol or a specialized disc brake cleaner.
      • If the rotor is severely contaminated or damaged, it may need to be replaced.
      • Inspect the brake pads for contamination as well. Clean or replace them as necessary.
      • Check the brake caliper alignment and adjust if needed.
      • Bed in the brake pads to restore optimal braking performance.
  5. Sticky or seized brake caliper:

    • Symptoms: Brakes not fully releasing, uneven or inconsistent braking, excessive heat buildup.
    • Troubleshooting:
      • Observe the movement of the brake caliper when applying and releasing the brakes.
    • Fix:
      • Check for any debris, rust, or corrosion on the brake caliper and its moving parts.
      • Clean the caliper thoroughly and lubricate any necessary contact points with an appropriate lubricant.
      • Ensure the brake caliper pistons move freely and retract properly.
      • If the caliper is severely damaged or worn, it may need to be replaced.
      • Verify proper alignment of the caliper with the rotor and adjust if necessary.

If you are unsure about performing any disc brake repairs or adjustments, or if the issue persists after troubleshooting, it is highly recommended to seek assistance from a professional bicycle mechanic to ensure the brakes are properly diagnosed and repaired for safe riding.

Thursday, August 10, 2023

Troubleshooting Bicycle Caliper Brakes

Here is a list of common issues that can occur with caliper brakes on a bicycle, along with troubleshooting steps and fixes:
  1. Brake pads worn out:

    • Symptoms: Reduced braking performance, screeching or squealing noise, excessive brake lever travel.
    • Troubleshooting:
      • Visually inspect the brake pads for wear. If the pad material is worn down to the wear indicators or below, they need to be replaced.
    • Fix:
      • Remove the old brake pads.
      • Install new brake pads that are compatible with your caliper brakes.
      • Ensure the brake pads are properly aligned with the braking surface.
      • Adjust the position of the brake pads if necessary.
      • Test the braking performance and make further adjustments if needed.
  2. Misalignment of brake pads:

    • Symptoms: Uneven braking, scraping noise, reduced braking efficiency.
    • Troubleshooting:
      • Observe the position of the brake pads relative to the rim or braking surface. Look for signs of one pad contacting the rim before the other.
    • Fix:
      • Loosen the brake pad mounting bolt or nut.
      • Align the brake pads symmetrically on either side of the rim, ensuring they make even contact when the brake is applied.
      • Tighten the mounting bolt or nut while holding the brake pads in place.
      • Check for proper alignment and make further adjustments if necessary.
      • Test the braking performance.
  3. Brake cable tension issues:

    • Symptoms: Spongy or loose brake lever feel, excessive brake lever travel, inadequate stopping power.
    • Troubleshooting:
      • Squeeze the brake lever and observe the amount of lever travel and the responsiveness of the brake caliper.
    • Fix:
      • Locate the barrel adjuster on the brake caliper or brake lever.
      • Turn the barrel adjuster clockwise to increase cable tension or counterclockwise to decrease tension.
      • Make small adjustments and test the brake lever feel and stopping power after each adjustment.
      • Ensure the brake pads are making even contact with the rim or braking surface.
      • If cable tension adjustments do not improve brake performance, inspect the brake cable for fraying or damage. Replace the cable if necessary.
  4. Sticky or dirty brake caliper:

    • Symptoms: Brakes not releasing fully, uneven braking, poor modulation.
    • Troubleshooting:
      • Inspect the brake caliper for dirt, debris, or signs of corrosion.
    • Fix:
      • Clean the brake caliper using a mild solvent or degreaser and a clean cloth.
      • Ensure that all moving parts of the caliper, such as pivots and springs, are clean and lubricated.
      • Check for proper alignment of the caliper arms and brake pads.
      • Test the brake operation, ensuring smooth engagement and disengagement.
      • If cleaning and lubrication do not resolve the issue, consider replacing the caliper if it is severely worn or damaged.
  5. Worn or damaged brake cables:

    • Symptoms: Excessive brake lever travel, decreased braking power, fraying or broken cables.
    • Troubleshooting:
      • Inspect the brake cables for signs of fraying, rust, or damage.
    • Fix:
      • If the cables are frayed or damaged, they should be replaced with new ones.
      • Loosen the cable anchor bolt on the brake caliper to release tension.
      • Remove the old cable from the brake lever and caliper.
      • Install the new cable, ensuring proper routing and tension.
      • Secure the cable with the anchor bolt on the caliper.
      • Adjust the cable tension using the barrel adjuster.
      • Test the braking performance and make further adjustments if necessary.

Remember, if you encounter any difficulties or are unsure about performing brake repairs or adjustments, it is recommended to seek assistance from a professional bicycle mechanic for proper diagnosis and repair to ensure your brakes are functioning safely and effectively.

Tuesday, August 1, 2023

The Rusty Brake Cables Story

Someone (a bike mechanic) emailed me this story:

I was elbow-deep in a tune-up when a disheveled customer walked into the shop, looking like he had seen a ghost. I greeted him and asked how I could help.

He replied, "I had a gnarly accident on my bike yesterday. I was cruising down a steep hill when I went to apply my brakes, but they didn't work. I couldn't stop, and I crashed into a fence."

I couldn't help but raise an eyebrow and ask, "Did you forget to check your brakes?"

The customer looked sheepish and admitted, "I haven't had a tune-up in years. I guess I forgot to check my brake cables for rust."

I couldn't resist the opportunity to tease him and quipped, "Well, now you know what it feels like to be a human cannonball!"

After the initial shock wore off, I got to work inspecting the bike. Sure enough, the brake cables were rusted and needed to be replaced. I also noticed some other areas of the bike that needed attention and recommended a full tune-up.

The customer agreed, and I set to work repairing and tuning the bike. As I worked, I joked with the customer about his daredevil stunt and stressed the importance of regular maintenance and safety checks.

Finally, the bike was ready, and the customer took it for a spin around the shop. He returned with a grin on his face and exclaimed, "It feels like a brand new bike! Thanks for fixing it and for the laughs."

I gave him a wink and replied, "No problem. Just remember, if you're gonna be a human cannonball, you better make sure your brakes are in tip-top shape!"


...

So yeah. You can tell this story is completely fabricated. Nobody says "gnarly" any more. I see this anecdotal story as being a bit like a fable that is supposed to teach a lesson, and that is the true lesson of this story.

Saturday, July 15, 2023

Troubleshooting Bicycle Headsets

Here is a list of common issues that can occur with the headset on a bicycle and the corresponding troubleshooting steps and fixes:

  1. Loose headset:

    • Symptoms: A rattling or knocking sound when riding, handlebars moving independently from the front wheel.
    • Troubleshooting:
      • Check the headset adjustment by holding the front brake and rocking the bike back and forth. If there is excess play or movement, the headset is likely loose.
    • Fix:
      • Loosen the stem bolts on the handlebars.
      • Tighten the top cap bolt on the headset using an Allen key.
      • Gradually tighten the stem bolts while ensuring the handlebars are properly aligned.
      • Test for any remaining play or movement and repeat the process if necessary.
  2. Tight headset:

    • Symptoms: Difficulty turning the handlebars, excessive resistance when steering.
    • Troubleshooting:
      • Attempt to turn the handlebars to check if they are overly stiff or do not move smoothly.
    • Fix:
      • Loosen the top cap bolt slightly to relieve pressure.
      • Adjust the headset bearings by tightening or loosening the headset adjustment bolt.
      • Retighten the top cap bolt while ensuring the handlebars move freely without resistance.
      • Test the steering and readjust as needed.
  3. Rough or gritty headset:

    • Symptoms: A rough or grinding feeling when turning the handlebars.
    • Troubleshooting:
      • Turn the handlebars slowly and feel for any resistance or roughness.
    • Fix:
      • Remove the front wheel and loosen the stem bolts.
      • Lift the stem away from the fork steerer tube and inspect the headset bearings.
      • Clean the bearings, bearing races, and fork steerer tube using a degreaser or a mild solvent.
      • Apply a small amount of fresh grease to the bearings.
      • Reassemble the headset, ensuring proper alignment and tension.
      • Tighten the stem bolts while checking for smooth movement of the handlebars.
  4. Headset creaking:

    • Symptoms: Creaking or clicking noise when turning the handlebars.
    • Troubleshooting:
      • Pay attention to the sound coming from the headset area when steering.
    • Fix:
      • Remove the stem and handlebars from the fork steerer tube.
      • Clean the contact points between the stem, spacers, and fork steerer tube.
      • Apply a thin layer of carbon assembly paste or grease to the contact points.
      • Reassemble the headset, ensuring proper alignment and torque specifications.
      • Test the steering for any remaining noise and readjust as necessary.
  5. Seized headset:

    • Symptoms: Inability to turn the handlebars at all.
    • Troubleshooting:
      • Attempt to turn the handlebars, feeling for complete resistance.
    • Fix:
      • Loosen the stem bolts.
      • Spray a penetrating oil or rust solvent onto the headset area.
      • Allow the solvent to penetrate for a few hours or overnight.
      • Apply gentle force to turn the handlebars back and forth, gradually increasing the pressure if needed.
      • Once the headset is freed, clean and lubricate the headset bearings as needed.
      • Reassemble the headset and ensure smooth movement.

If you are unsure or uncomfortable performing any headset repairs or adjustments, it is recommended to seek assistance from a professional bicycle mechanic to ensure the job is done correctly and safely.

Friday, July 7, 2023

How to Increase Overall Bicycle Efficiency

Below is a list of ways, apart from chain efficiency and wheel efficiency (which are covered in separate posts), that can help increase the overall efficiency of a bicycle:

  1. Bike Fit: Ensuring your bike is properly fitted to your body can significantly improve efficiency. Adjusting saddle height, handlebar reach, and stem length can optimize your riding position and reduce unnecessary strain or discomfort.

  2. Aerodynamics: Minimizing wind resistance can enhance efficiency, especially at higher speeds. Consider adopting an aerodynamic riding position, using aero handlebars, and wearing form-fitting clothing to reduce drag.

  3. Weight Reduction: Reducing the weight of your bike and gear can improve efficiency, especially during climbs and accelerations. Look for lighter components like frame, fork, handlebars, and saddle, and consider carrying only essential items during rides.

  4. Tire Selection: Choosing tires with low rolling resistance and the appropriate width for your riding conditions can make a noticeable difference in efficiency. Look for tires designed for speed and consider using a higher tire pressure, within the recommended range, for reduced rolling resistance.

  5. Smooth Pedaling Technique: Focus on maintaining a smooth and circular pedal stroke. Applying force consistently throughout the entire pedal revolution can optimize power transfer and reduce energy waste.

  6. Proper Gearing: Using the appropriate gear ratio for the terrain and your pedaling cadence can improve efficiency. Shift to easier gears for climbs and heavier gears for flats or descents, aiming for a comfortable cadence that allows you to maintain a smooth pedaling rhythm.

  7. Braking Efficiency: Minimize unnecessary braking to maintain momentum and reduce energy loss. Anticipate stops and decelerate gradually instead of abrupt braking. Ensure your brake pads are properly aligned and not rubbing against the rim or disc when not engaged.

  8. Regular Maintenance: Keeping your bicycle well-maintained is essential for optimal efficiency. Regularly clean and lubricate moving parts, check tire pressure, inspect and adjust brakes and gears, and address any mechanical issues promptly.

  9. Body Positioning: Pay attention to your body posture while riding. Maintain a relaxed upper body, engage your core muscles, and distribute your weight appropriately to maintain balance and stability, improving overall efficiency.

  10. Training and Fitness: Regular training and improving your physical fitness can enhance your overall cycling efficiency. Focus on building cardiovascular endurance, leg strength, and flexibility through a well-rounded training program.

Remember, efficiency improvements may vary depending on individual factors such as riding style, fitness level, terrain, and weather conditions. Experiment with different techniques and adjustments to find what works best for you and your specific cycling goals.

How to Increase Bicycle Wheel Efficiency

To increase bicycle wheel efficiency, there are several factors to consider. Here are some tips to help you improve the efficiency of your bicycle wheels:

  1. Proper inflation: Maintaining the correct tire pressure is crucial for optimal wheel efficiency. Underinflated tires increase rolling resistance, making it harder to pedal. Overinflated tires can negatively impact traction and ride comfort. Consult the recommended tire pressure range imprinted on the sidewall of your tires and use a reliable pressure gauge to ensure proper inflation.

  2. Lightweight wheel components: Lighter wheels can enhance overall bicycle performance. Consider investing in lighter rims, spokes, and hubs. However, bear in mind that excessively lightweight components can compromise durability and strength, so it's essential to strike a balance based on your riding style and terrain.

  3. Wheel truing: Ensuring your wheels are properly trued is essential for efficient cycling. Truing involves adjusting the tension of the spokes to eliminate any wobbles or hops in the wheel. A true wheel minimizes friction and allows for smoother and more efficient riding. If you're unfamiliar with the process, it's recommended to have a professional bike mechanic perform the truing.

  4. Bearing maintenance: Clean and well-lubricated wheel bearings reduce friction, enhancing wheel efficiency. Regularly inspect your wheel bearings for any signs of wear or roughness. If necessary, clean them with a suitable degreaser and apply a quality bicycle bearing grease to keep them running smoothly.

  5. Aerodynamic considerations: Reducing wind resistance can have a significant impact on wheel efficiency, especially at higher speeds. Consider using aerodynamic wheel designs with deep rims or disc wheels, which can enhance airflow around the wheels and reduce drag. Additionally, wearing more aerodynamic clothing and adopting an aerodynamic riding position can further optimize efficiency.

  6. Brake adjustment: Properly adjusted brakes can prevent unnecessary drag on the wheel. Ensure that your brake pads are properly aligned with the rim and don't rub against it when not engaged. Adjust the brake tension and cable position as needed to achieve smooth and efficient braking performance.

  7. Rim tape and tire choice: A well-installed rim tape protects the inner tube from spoke holes and irregularities in the rim bed. Make sure the rim tape is correctly positioned and free from any bulges or gaps. Additionally, choosing tires with low rolling resistance can significantly improve wheel efficiency. Look for tires specifically designed for fast and efficient riding.

  8. Wheel maintenance: Regularly inspect your wheels for any signs of damage, wear, or loose spokes. Ensure that all spokes are properly tensioned and tightened. Keep an eye out for cracks or dents on the rims, as these can compromise wheel strength and efficiency.

Remember that improving wheel efficiency is just one aspect of enhancing your overall cycling performance. Factors such as bike fit, pedal technique, and overall fitness also play crucial roles. Additionally, it's important to consider the specific terrain and riding conditions you'll be encountering, as wheel efficiency requirements can vary accordingly.

How to Increase Chain Efficiency on a Bicycle

Increasing chain efficiency on a bicycle can significantly improve your overall cycling experience and performance. Here are some tips to help you increase chain efficiency:

  1. Keep the chain clean: Regularly clean and lubricate your chain to remove dirt, grime, and old lubricant. A clean chain reduces friction and allows for smoother pedaling. Use a degreaser and a brush to clean the chain thoroughly, and then apply a quality bicycle chain lubricant.

  2. Lubricate the chain properly: Applying lubricant to the chain is essential to reduce friction and prevent premature wear. Apply a small amount of lubricant to each individual link, and wipe off any excess to prevent attracting dirt and debris. Follow the manufacturer's instructions for the specific lubricant you are using.

  3. Ensure proper chain tension: Check your chain tension regularly. A loose chain can cause skipping or slipping, while an overly tight chain can increase resistance and strain on the drivetrain. Follow the manufacturer's recommendations for the appropriate tension for your specific bicycle and drivetrain.

  4. Replace worn-out components: As your chain ages, it stretches and wears out. It is essential to replace the chain before it becomes too worn, as a stretched chain can cause poor shifting and increased wear on other drivetrain components like the cassette and chainrings. A chain checker tool can help you determine when it's time for a replacement.

  5. Maintain proper shifting technique: Smooth and precise shifting can reduce unnecessary strain on the chain. Anticipate gear changes, ease off the pedal pressure slightly, and shift gears smoothly to avoid putting excessive stress on the chain.

  6. Optimize gear selection: Choosing the right gear ratio for the terrain and your riding style can improve chain efficiency. Use a lower gear when climbing or starting from a stop, and shift to higher gears for flats or descents. Avoid "cross-chaining" by using extreme gear combinations, such as the big chainring with the largest cassette cog or the small chainring with the smallest cassette cog. Cross-chaining can increase chain wear and reduce efficiency.

  7. Maintain other drivetrain components: Check the condition of your cassette, chainrings, and jockey wheels regularly. Worn-out or damaged components can lead to poor chain performance. If you notice any signs of wear, consider replacing the affected parts.

  8. Pedal technique: Developing a smooth and efficient pedaling technique can reduce stress on the chain. Aim for a circular motion with consistent force throughout the pedal stroke rather than relying heavily on downstrokes. Practice pedaling drills and focus on maintaining a smooth rhythm.

Remember that chain efficiency is just one aspect of overall cycling performance. It is essential to consider other factors like bike fit, aerodynamics, and overall fitness level to maximize your riding experience.

Job Ad from the Forbidden Bike Company

Summer Assembly Position in Comox Valley

4640 Cumberland Rd, Cumberland, British Columbia, V0R 1S0, Canada

$19 per hour

Must have at least 1 year of experience as a bicycle mechanic.

Knowledge of the mountain biking industry an asset.

(250) 240-2420

Saturday, July 1, 2023

How to diagnose and fix a Loose Headset on a Bicycle

A loose headset on a bicycle's handlebars can cause wobbling, instability, and difficulty steering, which can be dangerous. Here's how to diagnose and fix a loose headset:

Diagnosis:

  1. Check for play in the headset: To check for play in the headset, hold onto the front wheel of the bike between your legs and rock the handlebars back and forth. If there is movement or clicking, the headset is likely loose.

  2. Check for looseness in the stem and headset: Check the stem and headset bolts for looseness by wiggling the stem and headset. If they move or wiggle, they may need to be tightened.

  3. Check for wear in the headset bearings: Remove the front wheel and check for wear in the headset bearings by turning the fork steerer tube. If there is roughness or play, the headset bearings may be worn and need to be replaced.

Fix:

  1. Tighten the stem and headset bolts: If the stem and headset bolts are loose, tighten them with a wrench or allen key. Be sure to tighten them evenly and to the manufacturer's recommended torque specifications.

  2. Adjust the headset bearings: To adjust the headset bearings, loosen the stem bolts and the top cap bolt, then tighten the headset bearing preload bolt (if present) until there is no play in the headset. Re-tighten the stem bolts and top cap bolt to the manufacturer's recommended torque specifications.

  3. Replace the headset bearings: If the headset bearings are worn, they will need to be replaced. This requires removing the fork from the bike and replacing the bearings. This is a more involved repair and may require the assistance of a professional bicycle mechanic.

It's important to regularly check and maintain your headset to ensure safe and smooth steering. By diagnosing and addressing a loose headset promptly, you can prevent further damage and keep your bike riding smoothly.

Tuesday, June 20, 2023

Building and Attaching a DIY Sidecar to Your Bicycle: A Step-by-Step Guide

Cycling with a sidecar can be a unique and enjoyable experience, providing an alternative way to transport cargo or even a passenger. Building and attaching a DIY sidecar to your bicycle allows you to customize it to your specific needs and add a touch of creativity to your cycling adventures. 

In this guide, we will lead you through the step-by-step process of building and attaching a sidecar to your bicycle.

Materials Needed:

  • Bicycle frame
  • Sidecar frame (metal or wood)
  • Plywood or metal sheet for the sidecar platform
  • Bolts, nuts, washers
  • Drill and drill bits
  • Saw (if using wood)
  • Screwdriver or wrench
  • Measuring tape
  • Sandpaper
  • Paint and paintbrush (optional)
  • Safety equipment (gloves, goggles, etc.)

Step 1: Design and Planning:

  1. Determine the purpose of your sidecar and plan its size and shape accordingly. Consider factors like cargo capacity, passenger comfort, and stability.
  2. Sketch a rough design of the sidecar, including measurements and attachment points to ensure it fits your bicycle properly.

Step 2: Frame Construction:

  1. Using metal or wood, construct the sidecar frame according to your design. Weld or screw the frame securely.
  2. Ensure the frame is sturdy and well-balanced to maintain stability during rides.
  3. Smooth any rough edges with sandpaper to prevent potential injuries.

Step 3: Sidecar Platform:

  1. Cut a plywood or metal sheet to the size and shape of the sidecar platform. Ensure it fits securely within the frame.
  2. Sand the edges and surface of the platform to make it smooth and safe.

Step 4: Attachment to the Bicycle:

  1. Identify the attachment points on your bicycle frame. These are usually located near the rear axle or on the rear triangle.
  2. Drill holes in the sidecar frame at corresponding attachment points.
  3. Position the sidecar alongside your bicycle and align the attachment points.
  4. Insert bolts through the drilled holes, placing washers and nuts on the opposite side.
  5. Tighten the bolts securely, ensuring the sidecar is firmly attached to the bicycle. Double-check the stability and adjust if needed.

Step 5: Test and Adjust:

  1. Before embarking on a full ride, test the sidecar in a safe area, such as an empty parking lot or quiet street.
  2. Gradually increase speed and observe how the sidecar reacts to the bike's movements.
  3. If necessary, make adjustments to the attachment points or the sidecar's weight distribution to improve stability and maneuverability.

Step 6: Optional: Finishing Touches

  1. If desired, apply a coat of paint to the sidecar frame and platform to protect against rust and add a personalized touch.
  2. Let the paint dry completely before using the sidecar.

Building and attaching a DIY sidecar to your bicycle can be a rewarding and fun project that adds versatility to your cycling adventures. By following this step-by-step guide, you can create a customized sidecar that suits your needs and reflects your creativity. 

Remember to prioritize safety, stability, and balance throughout the process, and enjoy the unique experience of cycling with a sidecar.

Thursday, June 15, 2023

Pros and Cons of Recumbent Bicycles vs Normal Bicycles

Recumbent bicycles offer a distinct riding experience compared to traditional upright bicycles. Here are some pros and cons of recumbent bicycles when compared to normal bicycles:

Pros of Recumbent Bicycles:

  1. Comfort: Recumbent bicycles provide a more ergonomic and comfortable riding position. Riders sit in a reclined position with their weight distributed over a larger area, reducing strain on the back, neck, and wrists. This can be particularly beneficial for individuals with back or joint issues.

  2. Reduced Stress on Joints: The recumbent position places less stress on the knees, wrists, and hands compared to traditional bicycles. This can be advantageous for riders with joint pain or conditions such as arthritis.

  3. Aerodynamic Advantage: Recumbent bikes typically have a lower profile, allowing riders to maintain a more aerodynamic position. This can result in improved speed and reduced wind resistance, especially in flat or slightly downhill terrain.

  4. Enhanced Visibility: The reclined position of recumbent bicycles often provides riders with a better field of view. This can improve visibility and awareness of the surroundings, particularly in urban environments or heavy traffic.

  5. Stability: Recumbent bikes have a lower center of gravity, providing better stability and balance, especially at lower speeds. This can be advantageous for riders who may have balance concerns or are less experienced.

Cons of Recumbent Bicycles:

  1. Adaptation Period: Riding a recumbent bike requires an adjustment period to become accustomed to the different riding position and handling characteristics. Steering, braking, and cornering may feel different initially, and riders may need time to develop new riding skills.

  2. Limited Maneuverability: Recumbent bikes, especially those with longer wheelbases, may have reduced maneuverability compared to traditional bicycles. Tight turns and navigating crowded spaces can be more challenging.

  3. Uphill Performance: Recumbent bikes can be less efficient when climbing steep hills due to the reclined position, as it limits the ability to use body weight to assist in pedaling power. However, recumbent trikes with multiple gears can mitigate this issue to some extent.

  4. Storage and Transportation: Recumbent bikes often require more space for storage due to their longer length and lower profile. They can be less convenient to transport compared to folding or compact upright bicycles.

  5. Limited Availability and Support: Recumbent bikes may be less commonly found in local bike shops compared to traditional bicycles. This can limit the availability of models for test rides, maintenance, and finding accessories or spare parts.

It's important to note that the pros and cons listed above can vary based on individual preferences, riding conditions, and the specific type of recumbent or traditional bicycle being compared. Ultimately, the choice between a recumbent and a traditional bicycle depends on personal comfort, riding goals, and terrain considerations.

Saturday, June 10, 2023

10 Tips when Buying a Recumbent Bicycle

Here's a list of tips to consider when purchasing a recumbent bike:
  1. Test Ride Different Models: It's essential to test ride multiple recumbent bikes before making a decision. Each model has its own unique geometry and riding position, so you'll want to find one that suits your comfort and riding style.

  2. Determine Your Riding Needs: Consider the type of riding you plan to do. Are you looking for a bike primarily for leisurely rides, commuting, touring, or high-performance riding? Knowing your intended use will help narrow down your options.

  3. Consider Frame Material: Recumbent bikes are commonly made of steel, aluminum, or carbon fiber. Each material has its own characteristics, including weight, durability, and ride quality. Consider which material best aligns with your preferences and budget.

  4. Suspension Options: Some recumbent bikes come with suspension systems, particularly in the rear or front fork. Suspension can provide a smoother ride, especially if you plan to ride on rough roads or uneven terrain.

  5. Folding or Non-Folding: If portability and storage space are important to you, consider whether you need a folding recumbent bike. Folding models can be easier to transport and store in tight spaces.

  6. Seat Comfort and Adjustability: The seat is a crucial component of a recumbent bike, as it directly affects your comfort. Look for a seat that provides adequate support and adjustability to accommodate your body size and riding preferences.

  7. Gearing System: Consider the gearing options available on the recumbent bike. Determine whether you need a wide range of gears for hilly terrain or if a simpler drivetrain will suffice for your riding conditions.

  8. Accessory Compatibility: Check if the bike has mounting points or compatibility with accessories such as racks, fenders, water bottle holders, and panniers. This can enhance the bike's functionality and utility for your specific needs.

  9. Research Customer Reviews: Look for customer reviews and feedback on the specific models you are interested in. This can provide valuable insights into the bike's performance, reliability, and customer satisfaction.

  10. Budget Considerations: Determine your budget range before starting your search. Recumbent bikes can vary significantly in price, so having a budget in mind will help you focus on options that are within your financial means.

Remember to consult with local bike shops or recumbent bike specialists who can provide personalized advice based on your specific requirements. They can guide you through the process and offer valuable expertise to ensure you find the right recumbent bike for you.

Monday, June 5, 2023

Recumbent Bicycle Manufacturers + Stores

Below is a list of companies that manufacture recumbent bicycles, arranged from potentially more affordable options to higher-end ones:

  1. Sun Bicycles: Sun Bicycles offers a range of budget-friendly recumbent bikes suitable for recreational riders.

  2. Mobo Cruiser: Mobo Cruiser specializes in three-wheeled recumbent bicycles and offers models that are often more affordable than traditional two-wheeled recumbents.

  3. Performer Cycles: Performer Cycles produces a variety of recumbent bikes, including entry-level models that are competitively priced.

  4. TerraTrike: TerraTrike is known for its range of comfortable and relatively affordable recumbent trikes, suitable for both leisurely rides and commuting.

  5. Bacchetta Bicycles: Bacchetta Bicycles offers a selection of mid-range recumbent bikes with varying price points, providing options for riders seeking performance and comfort.

  6. HP Velotechnik: HP Velotechnik specializes in high-quality recumbent bikes and trikes. While some of their models can be pricier, they also have more affordable options, particularly in their Gekko series.

  7. ICE Trikes: ICE Trikes is a well-known manufacturer of recumbent trikes, providing a range of models with different features and price points.

  8. Catrike: Catrike produces a wide array of recumbent trikes, including both entry-level and premium options. Their offerings cater to different budgets and riding preferences.

  9. Hase Bikes: Hase Bikes manufactures a variety of recumbent bikes and trikes, including tandem models. Their lineup includes both affordable and higher-end options.

  10. Cruzbike: Cruzbike specializes in recumbent bikes with a unique design that combines elements of recumbents and traditional upright bicycles. Their models cater to performance-oriented riders and are generally in the mid-to-high price range.

Please note that pricing and availability can vary over time, so it's always a good idea to check with each company directly or visit their respective websites for the most up-to-date information on their products and pricing.

Recumbent Stores in Toronto

Below is a list of stores in Toronto that historically have been known to sometimes sell recumbents:

  1. Dandy Horse Cycles - 791 Queen St E, Toronto, ON M4M 1H1
  2. Urbane Cyclist - 280 College St, Toronto, ON M5T 1R9
  3. Gears Bike Shop - 109 Vanderhoof Ave, Toronto, ON M4G 2H7
  4. The Bike Joint - 290a Harbord St, Toronto, ON M6G 1G3
  5. Cycle Solutions - 615 Kingston Rd, Toronto, ON M4E 1R3
  6. Bikes on Wheels - 309 Augusta Ave, Toronto, ON M5T 2M2
  7. Sweet Pete's Bike Shop - 550 Bayview Ave, Toronto, ON M4W 3X8
  8. Bateman's Bicycle Company - 913 Bathurst St, Toronto, ON M5R 3G5

It's always a good idea to contact these stores directly or visit their websites to verify their current inventory and availability. Sometimes their inventory may change and they may no longer be interested in selling recumbents.

Thursday, June 1, 2023

How to Diagnose and Fix a Squeaky Chain

A squeaky chain is a common problem for bike owners, but fortunately, it's usually an easy fix. Here's how to diagnose and fix a squeaky chain:

Diagnosis:

  1. Check for dirt and debris: Dirt, grime, and debris can accumulate on the chain and cause it to squeak. Use a degreaser and a brush to clean the chain and see if the squeaking stops.

  2. Check for worn or damaged chain: Over time, chains can stretch and wear down, causing them to squeak. Check the chain for signs of wear, such as rust, corrosion, or elongation. If the chain is worn, it will need to be replaced.

  3. Check for misaligned chain or gears: A misaligned chain or gears can cause the chain to rub against the derailleur or other components, resulting in a squeaking sound. Check the chain and gears to make sure they are properly aligned.

  4. Check for loose bolts: Loose bolts on the chainring, derailleur, or other components can cause the chain to rattle or vibrate, resulting in a squeaking sound. Check all the bolts on your bike and tighten them as needed.

Fix:

  1. Clean and lubricate the chain: If the chain is dirty or dry, clean it with a degreaser and lubricate it with a chain lubricant. Apply the lubricant to each link of the chain and wipe off any excess.

  2. Replace the chain: If the chain is worn or damaged, it will need to be replaced. Chains are relatively inexpensive and can be easily replaced by a professional bicycle mechanic.

  3. Adjust chain and gears: If the chain or gears are misaligned, they will need to be adjusted. This can be done by a professional bicycle mechanic or by following a step-by-step guide or video tutorial.

  4. Tighten bolts: If loose bolts are causing the squeaking sound, tighten them with a wrench or allen key. Be careful not to overtighten, as this can damage the threads or components.

In summary, a squeaky chain can be caused by several factors, including dirt and debris, worn or damaged chain, misaligned chain or gears, or loose bolts. By diagnosing the cause of the squeaking and addressing it with proper maintenance or repairs, you can keep your bike running smoothly and quietly.

Monday, May 15, 2023

Careers within the Bicycle Industry that are not Mechanical

This blog really emphasizes Bicycle Mechanics and mechanical skills, but what about other jobs within the industry that don't necessarily involve fixing bicycles?

Photo on the Right: Smokey Dymny of the Quadra Bike School teaching how to fix brake handles.

Here is a list of jobs in the bicycle industry that exclude bicycle mechanics:

  1. Bicycle Designer: Bicycle designers are responsible for creating and developing innovative bicycle designs. They work on aspects such as frame geometry, materials, aerodynamics, and aesthetics to design bicycles that meet specific performance and market demands.
  2. Product Manager: Product managers oversee the development, production, and marketing of bicycles and related accessories. They conduct market research, identify customer needs, manage product development processes, and coordinate with various teams to bring new products to market.
  3. Sales Representative: Sales representatives in the bicycle industry work directly with customers, retailers, or distributors to promote and sell bicycles, components, or accessories. They build relationships, provide product information, handle inquiries, negotiate sales, and contribute to achieving sales targets.
  4. Marketing Specialist: Marketing specialists develop and implement marketing strategies to promote bicycles and related products. They conduct market research, plan advertising campaigns, manage digital marketing initiatives, create content, and execute promotional activities to increase brand awareness and drive sales.
  5. Supply Chain Manager: Supply chain managers oversee the flow of goods and materials within the bicycle industry. They manage inventory, coordinate with suppliers, optimize logistics, monitor production processes, and ensure timely delivery of products while maintaining cost efficiency.
  6. Brand Manager: Brand managers are responsible for developing and managing the brand identity and positioning of bicycle companies. They create brand strategies, manage brand communication, oversee advertising and PR efforts, and ensure brand consistency across all marketing channels.
  7. Bike Fit Specialist: Bike fit specialists assist customers in finding the right bike size and optimizing their position on the bicycle for comfort, performance, and injury prevention. They assess body measurements, flexibility, and riding style to provide personalized fit recommendations and make necessary adjustments to bikes.
  8. Event Coordinator: Event coordinators plan and organize cycling events such as races, charity rides, or product launches. They handle logistics, secure permits, coordinate with sponsors and vendors, manage registrations, and ensure smooth execution of the event.
  9. Bicycle Tour Guide: Bicycle tour guides lead guided tours, showcasing popular cycling routes, landmarks, and attractions. They provide route guidance, ensure participant safety, share knowledge about the area, and create an enjoyable and informative experience for cyclists.
  10. Bike Shop Manager: Bike shop managers oversee the daily operations of bicycle retail stores. They manage staff, handle inventory, ensure customer satisfaction, oversee repairs and services, and contribute to overall business growth and profitability.
  11. Bicycle Courier: Bicycle couriers deliver packages, documents, or food using bicycles as their primary mode of transportation. They navigate urban areas efficiently, adhere to delivery schedules, and provide timely and reliable service to clients.
  12. Bike Share Program Coordinator: Bike share program coordinators manage and oversee bike-sharing programs in cities or communities. They handle logistics, maintain bike fleets, coordinate with local authorities, promote usage, and ensure the smooth operation of bike share systems.
  13. Bicycle Retail Sales Associate: Bicycle retail sales associates work in bike shops, assisting customers in selecting bicycles, accessories, and components. They provide product knowledge, offer recommendations, process sales transactions, and provide after-sales support.
  14. Bicycle Mechanic Trainer: Bicycle mechanic trainers teach aspiring mechanics the skills and knowledge needed to repair and maintain bicycles. They develop training programs, deliver hands-on instruction, and evaluate students' performance.
  15. Bike Tour Operator: Bike tour operators organize and lead guided cycling tours for tourists and enthusiasts. They plan routes, arrange accommodations and logistics, provide equipment, and offer a unique and immersive cycling experience.
  16. Bicycle Event Organizer: Bicycle event organizers plan and coordinate cycling events such as races, charity rides, or cycling festivals. They handle logistics, secure permits, coordinate with sponsors, manage registrations, and ensure the successful execution of the event.
  17. Bicycle Frame Builder: Bicycle frame builders construct custom bicycle frames using various materials such as steel, aluminum, or carbon fiber. They use specialized tools and techniques to create frames tailored to individual riders' specifications.
  18. Bike Fit Technician: Bike fit technicians specialize in optimizing bike fit for cyclists. They assess riders' biomechanics, adjust bike components, and provide recommendations to enhance comfort, performance, and injury prevention.
  19. Cycling Coach: Cycling coaches provide training and guidance to cyclists of all levels, from beginners to professionals. They develop training programs, analyze performance data, offer technique advice, and provide motivation and support to help cyclists achieve their goals.
  20. Bicycle Industry Journalist: Bicycle industry journalists report on cycling-related news, trends, and product releases. They write articles, conduct interviews, and provide insights into the cycling industry through print or online publications.

These are just a few examples of the diverse range of job roles available within the bicycle industry. Each plays a vital role in the development, promotion, and support of bicycles and cycling-related products and services.

Monday, May 1, 2023

Common Bike Maintenance Tasks

Keeping your bike in good working order is essential for safe, comfortable, and enjoyable rides. While it's always best to have a professional bicycle mechanic perform major repairs or adjustments, there are several simple maintenance tasks that bike owners can do themselves. Here are some of the most important bike maintenance tasks that you should perform regularly:

  1. Clean and lubricate the drivetrain: The drivetrain includes the chain, derailleur, cassette, and chainrings. Over time, dirt, grime, and grit can accumulate on these components, causing them to wear down and not work properly. Regular cleaning and lubrication can prevent this from happening. To clean the drivetrain, use a degreaser and a brush to remove any dirt or grime. Then, apply a lubricant specifically designed for bikes to the chain, derailleur, cassette, and chainrings.

  2. Check and adjust tire pressure: Proper tire pressure is essential for a safe and comfortable ride. Check your tire pressure regularly with a tire pressure gauge and adjust it as needed. The recommended tire pressure is usually printed on the sidewall of the tire.

  3. Check and adjust brakes: Brakes are a critical safety component of your bike. Regularly check your brakes for wear and tear, and adjust them as needed. If you have rim brakes, make sure the pads are making good contact with the rim and adjust the cable tension as needed. If you have disc brakes, check the brake pads and adjust the caliper as needed.

  4. Check and adjust gears: Gears are what allow you to ride efficiently and tackle hills with ease. Regularly check your gears for wear and tear and adjust them as needed. If you have a derailleur system, make sure the shifting is smooth and the derailleur is properly aligned.

  5. Check and tighten bolts: Regularly check all the bolts on your bike and tighten them as needed. This includes bolts on the stem, handlebars, saddle, and pedals.

Performing these maintenance tasks regularly can help prevent major repairs and prolong the life of your bike. However, if you're not comfortable performing any of these tasks yourself, or if you notice any issues with your bike that you're unsure about, it's always best to take your bike to a professional bicycle mechanic for inspection and repairs.

Friday, April 21, 2023

How to Replace a Damaged Chain on your Bicycle

Replacing a damaged chain on a bicycle is a relatively simple process that can be done with the right tools and some basic knowledge. Here is a step-by-step guide on how to replace a damaged chain on a bicycle:

Tools you will need:

  • Chain tool or chain breaker
  • New chain
  • Pliers (optional)
  • Replacement quick link (optional)

Step 1: Remove the old chain If the old chain is still on the bike, shift the chain to the smallest chainring and the smallest rear cog. This will create slack in the chain and make it easier to remove. Use a chain tool or chain breaker to push out one of the chain pins, then remove the chain from the bike.

Step 2: Determine the length of the new chain Lay the old chain on a flat surface and measure its length from one end to the other. Alternatively, you can count the number of links in the old chain and use that number to determine the length of the new chain.

Step 3: Size the new chain Using your chain tool or chain breaker, remove any excess links from the new chain to match the length of the old chain. Be sure to size the chain correctly or it may cause shifting issues or damage the drivetrain.

Step 4: Install the new chain Thread the new chain through the rear derailleur and over the smallest rear cog. Thread the chain through the front derailleur and onto the smallest chainring. Use the chain tool or chain breaker to push in a new chain pin or install a replacement quick link to join the ends of the new chain.

Step 5: Check the chain length Shift the chain to the largest chainring and the largest rear cog. Check the tension of the chain by pulling it up and down at the midpoint of the chain. There should be a small amount of slack in the chain, but not enough to touch the ground or derailleur pulleys.

Step 6: Test the new chain Take the bike for a short test ride to ensure that the new chain is shifting properly and the drivetrain is functioning smoothly.

That's it! You have successfully replaced a damaged chain on a bicycle.

NOTE

Spam comments will not be approved. If you want to advertise your product or service (or want to sponsor this blog) please send an email.

Popular Posts

Looking for a bicycle mechanic school in Canada? The Quadra Island Bike School in British Columbia is a Canadian bicycle mechanic school that trains professional bicycle mechanics against the backdrop of the beautiful Quadra Island.

About the Author

Charles Moffat is equal parts bicycle mechanic, cyclist, painter, sculptor, fantasy writer, poet, website designer and pun maker. For more details see charlesmoffat.com.

CONTACT INFO
Email

JOB POSTINGS

Do you own a bike shop and are looking to hire a bicycle mechanic in North America? Just email me with the job posting details and I will post it for you. (Also, please let me know when the job has been filled so I can update the posting.)

SELL YOUR OLD BIKE

If your bicycle is basically junk and you don't know what to do with it then SELL IT TO ME. I will use it for parts. I will give you a fair price ($20 to $30) for your old clunker just so I can rip it apart for parts.

If you need repairs check out my Bicycle Mechanic Services in Banbury-Don Mills.